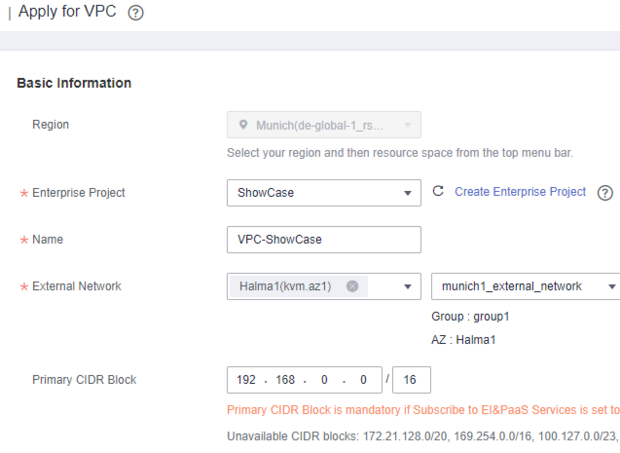
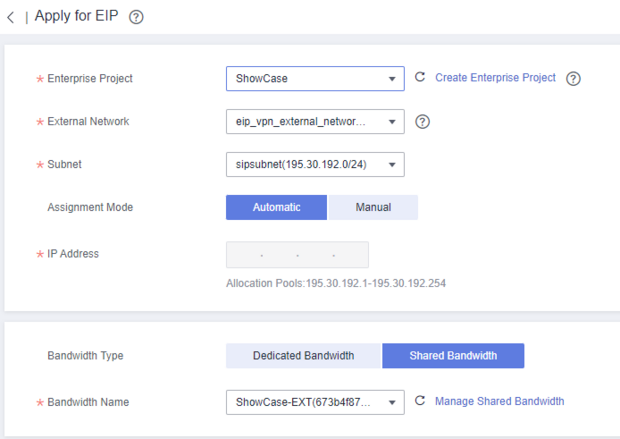
In the first section, you select the appropriate Enterprise Project.
In this case, everything created is billed via ShowCase .
The NAME should be meaningful so that the correct network can always be recognised directly.
External Network does not need to be customised.
The PRIMARY CIDR BLOCK represents the network segment in which we then create our subnets.
This should therefore not be too small. The same block can be used in several VPC
, as these act separately.
Our recommendation is to start with 192.168.0.0 / 16. Below this is a list of network segments that cannot be used by
.
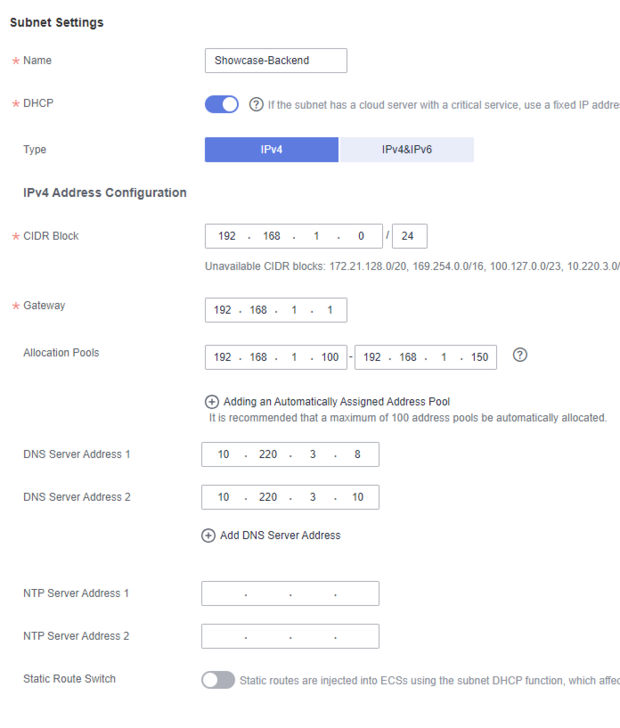
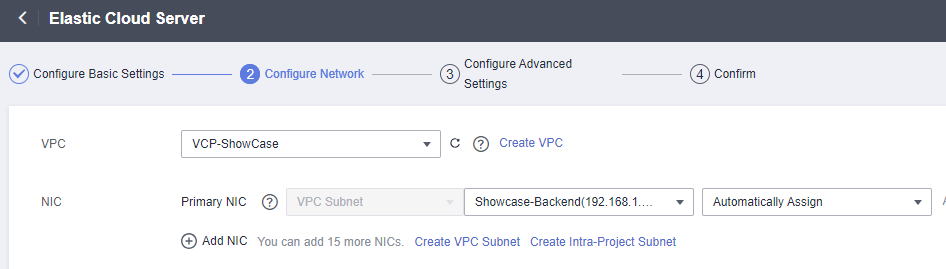
In the second section, we create the first subnet.
We start by naming the subnet. A meaningful name should also be selected here.
DHCP can be used to decide whether there is a dynamically managed IP pool.
In this example, I only select IPv4 as the type . Analogue to v4, v6 also works.
The CIDR block must be below our Primary CIDR block block. We therefore create the subnet with 192.168.1.0 / 24.
The gateway is automatically stored with a click in the box and does not need to be adjusted.
The allocation pools represent the DHCP dynamically distributed area from which the ECS obtain their first IP.
The DNS servers are provided by the SpaceNet.Cloud, but can be customised.

Explanation
Security groups are firewall rules (~IPSEC) for ECSs and load balancers. These can be nested together and any number can be assigned to an ECS.
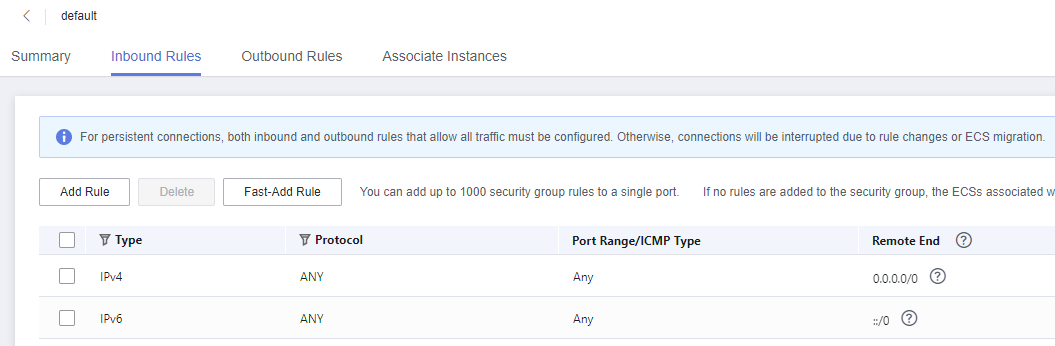
The default group is assigned to each ECS by default when it is created.
0.0.0.0/0 means that all IP addresses are released. This also includes the IP addresses of the VPC.
Firstly, the inbound rules should be removed from the default group, as these release the server for the whole world.
However, removing them also interrupts the traffic between the ECS!
Default Group

Recommended setup
(1) - Edit the default group
Delete the inbound rules in the default group. This group is only used for the activation of outgoing traffic.
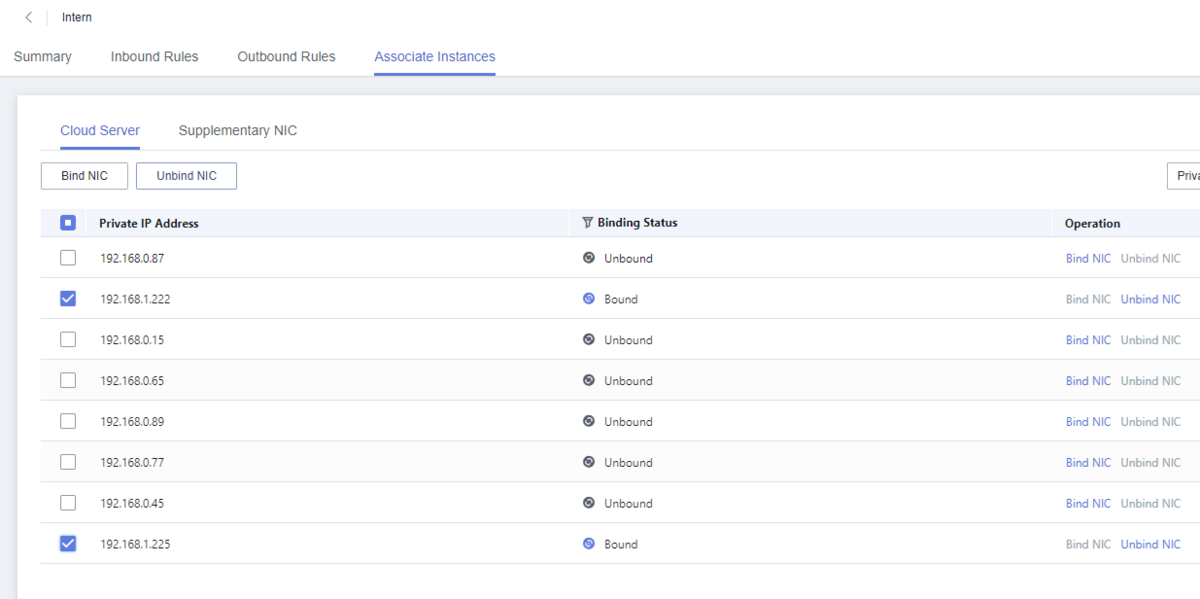
(2) - Create security groups for internal communication
Create a security group for each subnet created, which contains the release ANY with Remote End for the entire subnet.
The VPC has 192.168.0.0/16. The internal subnet has 192.168.1.0/24.
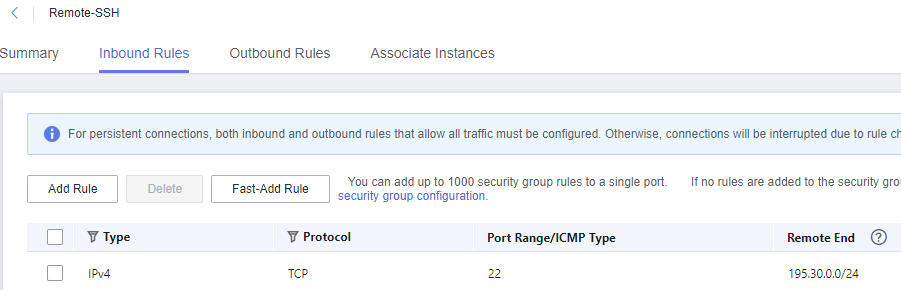
(optional) - Remote access
If there is a static IP from which you want to manage the ECS, you can create a security group that only allows incoming SSH from this IP range, for example.
This means that port 22 is only accessible from the network 195.30.0.0/24.
This group can then be assigned to the Linux ECS.
However, the better solution is to use a VPN gateway or to work via the Web Console.

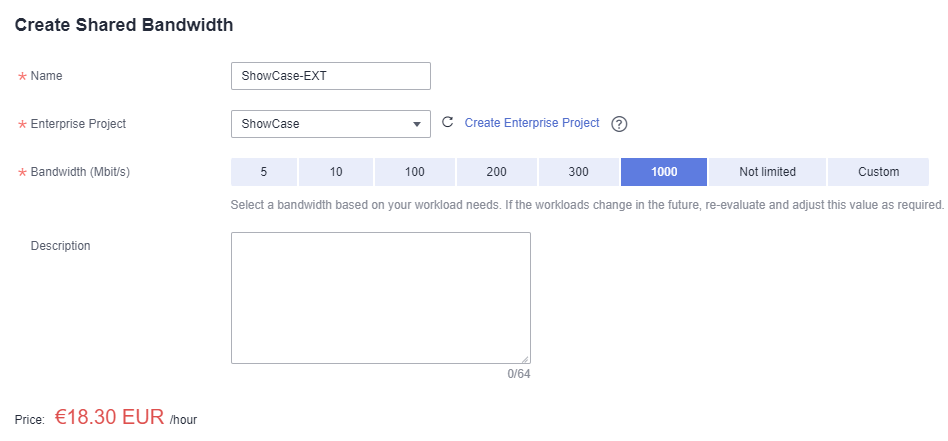

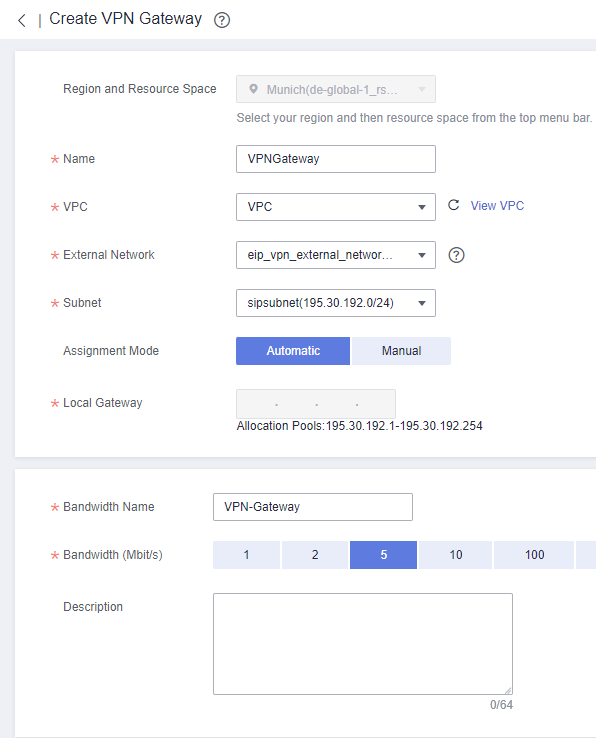
Under Name, select a suitable name that should also match your subnet or VPC. Under VPC, select the corresponding Virtual Private Cloud.
The bandwidth name should match the gateway name so that it can be assigned more quickly. It is not possible to use a shared bandwidth here,
as this is special traffic.
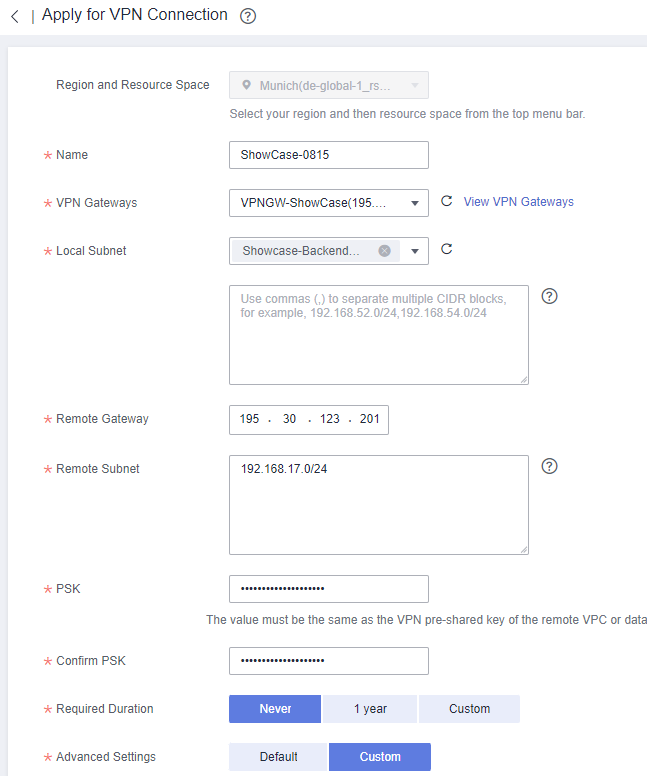
Now the actual VPN tunnel is created. To do this, a new VPN connection is created in the menu of the same name.
The name should give you information about the endpoint, for example.
We use the VPN gateway we have just created.
Remote Gateway is the endpoint outside the cloud. For example, your
firewall on site at your location.
Remote Subnet is the network area at your location that you want to route.
PSK is the key/password between your device and the cloud.